
How to add Instagram widget to BigCommerce
This tutorial shows several methods to add an Instagram widget to your BigCommerce store.
Step-by-step instructions for Page Builder
This tutorial does not show how to create and configure a BigCommerce store from scratch. We assume that you already have a working installation of BigCommerce.
Step 1 – Login to your BigCommerce store.

Start with logging in to your BigCommerce store. Make sure that your user has permission to edit store settings.
Step 2 – Launch Page Builder.

Select Storefront and My Themes from the menu on your screen’s left side.
You should see a list of available themes. Click Customize button under the Current Theme section. It will launch Page Builder.
Step 3 – Add HTML widget.

From the drop-down list, select the page where you want to add our widget. In our case, it is Frontpage.
Select the Widgets icon from the left menu. In the Page Builder drag the HTML widget from the Basic section and drop it onto the page where you want to add the widget. Places where you can drop HTML widgets are marked with Drag and drop widgets here text.
Step 4 – Paste your widget embed code.
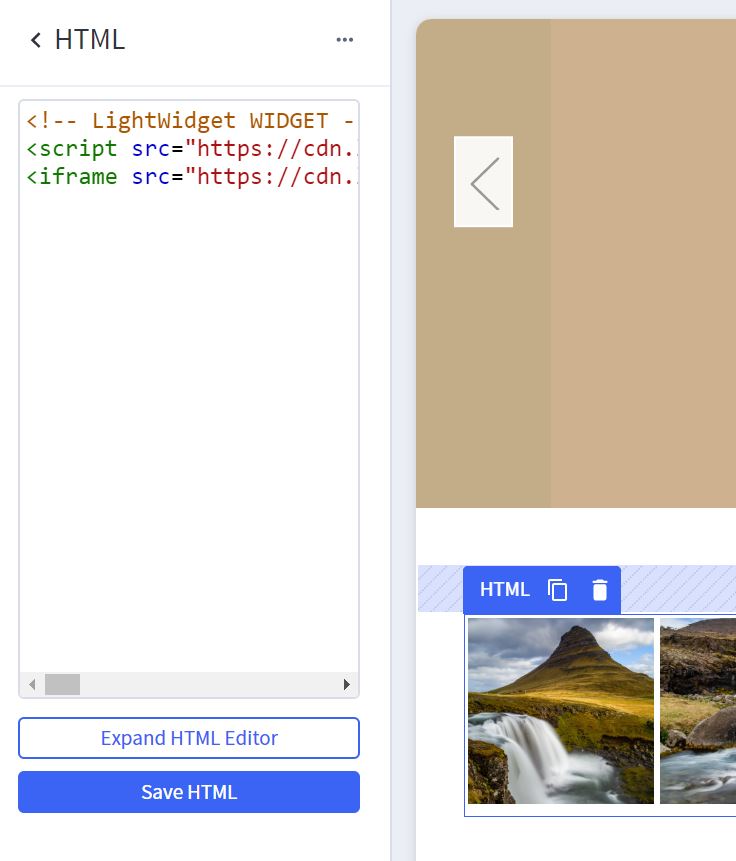
Once you drop the HTML widget onto your page on the screen’s left side, you should see the default HTML content. Remove it and paste your widget embed code into the new field. Click the Save HTML button.
If you don’t know where to find your widget embed code, please read this tutorial – where can I find my widget embed code?
Step 5 – Save changes to your design.
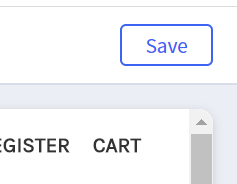
Once you are happy with your page, click the Save button in the top right corner. Congratulations! You just added the Instagram widget to your BigCommerce store!
Step-by-step instructions for Web Pages and blogs
If your BigCommerce theme does not support page builder or, for instance, you want to add the widget to one of your BigCommerce Web Pages or Blog posts, this is an alternative way of embedding the widget.
Step 1 – Login to your BigCommerce website.
Like the Page Builder method, you must log in to your BigCommerce store.
Step 2 – Create a new script.

BigCommerce, by default, strips specific attributes from iframe elements like a border or hiding scrollbars in our widget embed code. It happens only when you try to paste the widget code in the content editor on Web Pages or Blog posts. It does not affect Page Builder described in the previous method.
To fix that problem, you need to add a custom script, which will fix stripped tags.
From the menu on the left side of the screen, select Storefront and Script Manager. Please click Create a Script button near your screen’s right side.
Step 3 – Configure the new script.
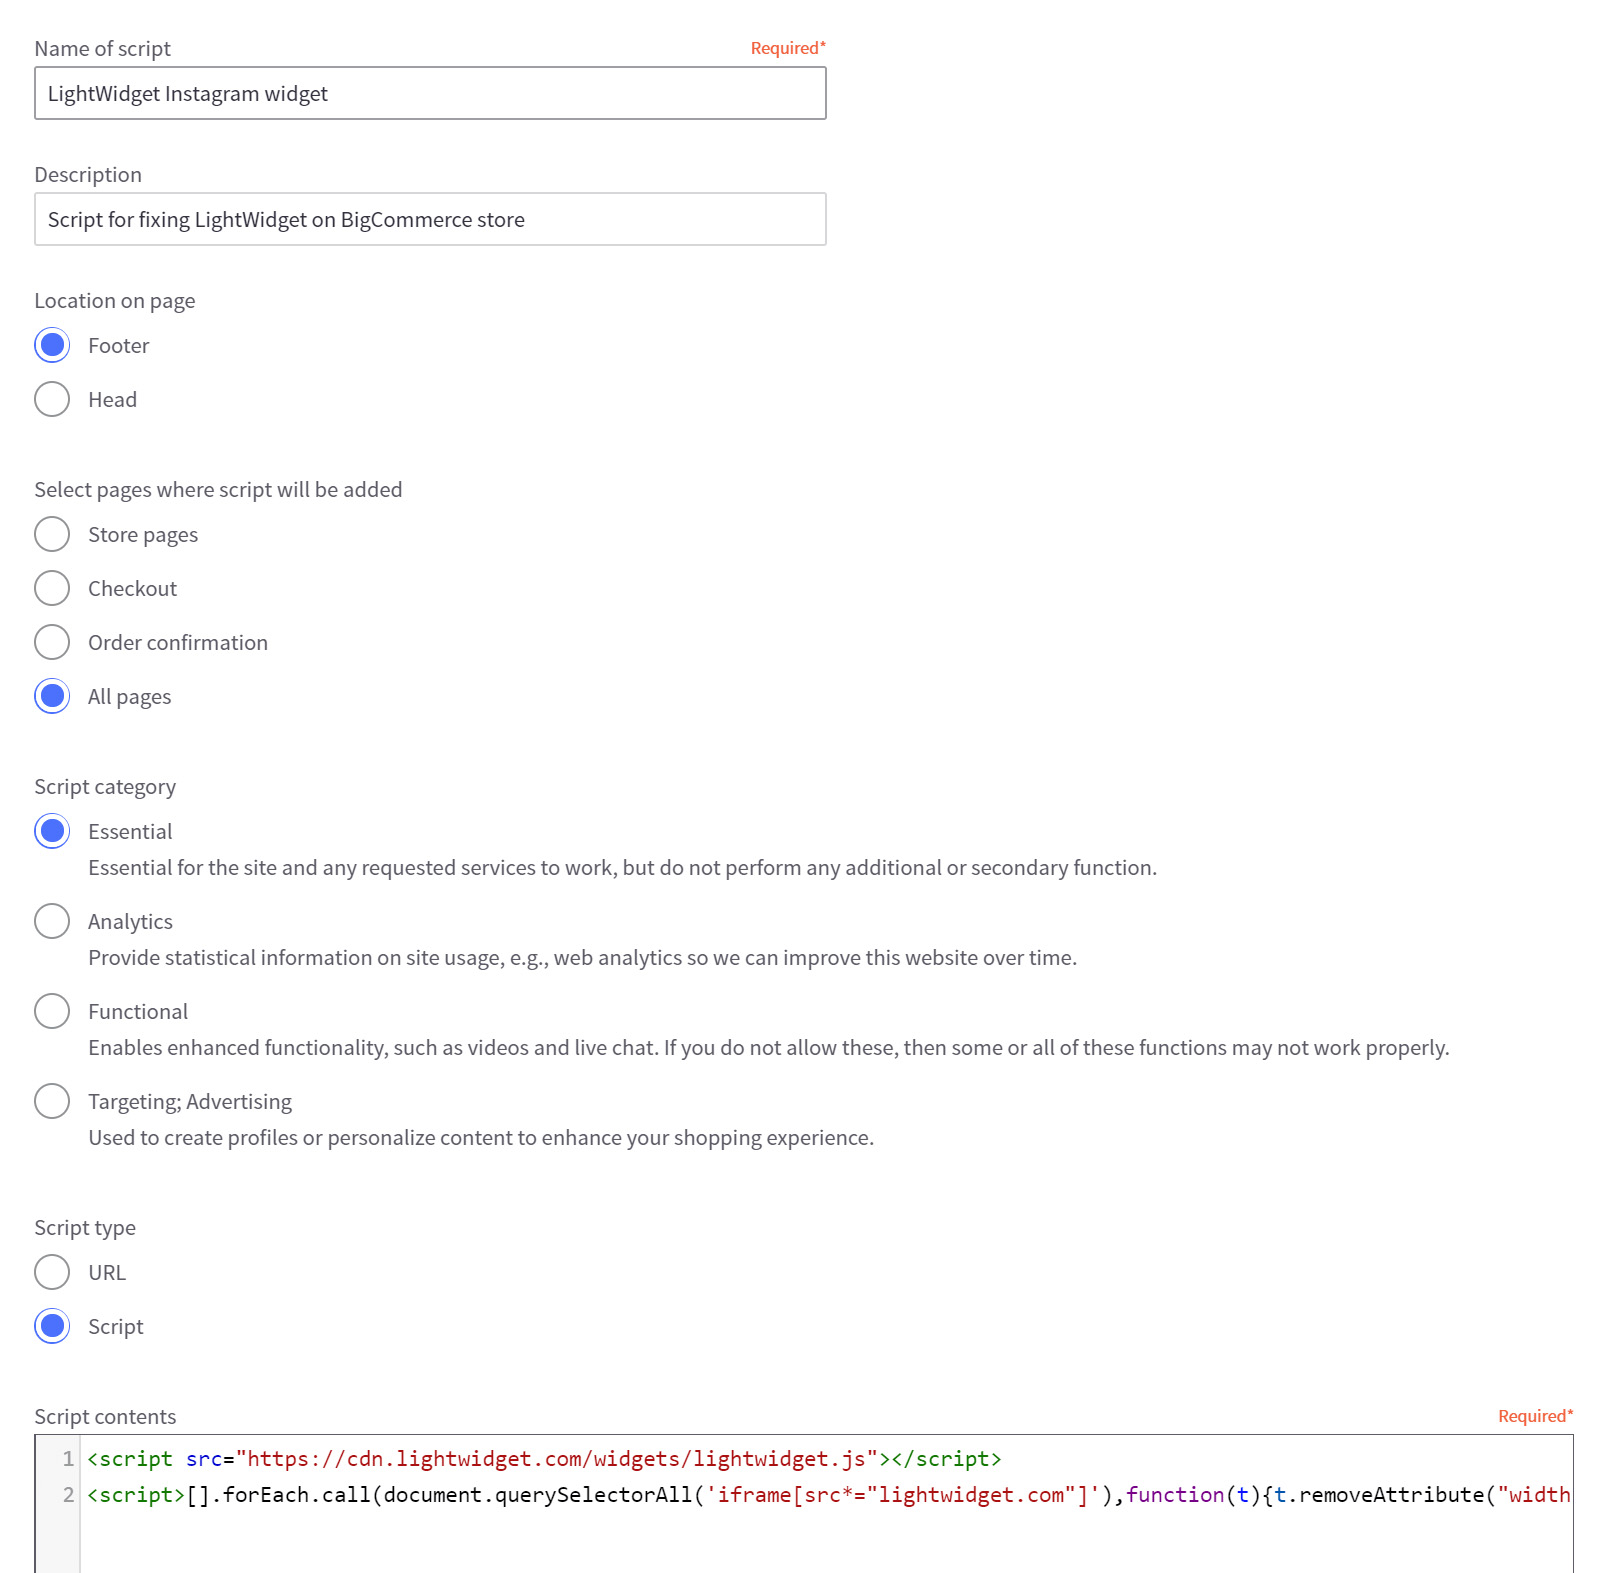
There are a couple of fields that you need to fill in on the new script page:
- Name of script – you can enter any value you want. In our case, it’s the LightWidget Instagram widget.
- Description – you can provide any description you want. In our case, it’s a Script for fixing LightWidget on the BigCommerce store.
- Location on page – select Footer.
- Select pages where script will be added – select All pages.
- Script category – select Essential. Functional type would be better, but the scripts are loaded differently when you choose this category.
- Script type – select Script.
- Script contents – copy and paste the code from below:
    <script src="https://cdn.lightwidget.com/widgets/lightwidget.js"></script>

    <script>[].forEach.call(document.querySelectorAll('iframe[src*="lightwidget.com"]'),function(t){t.removeAttribute("width"),t.removeAttribute("height"),t.setAttribute("scrolling","no"),t.setAttribute("allowtransparency","true"),t.setAttribute("style","width:100%;border:0;overflow:hidden;")});</script>
Click the Save button at the bottom of the page to save changes. This script does restore all attributes in the widget that BigCommerce strips.
Step 4 – Add the widget to Web Page or Blog.
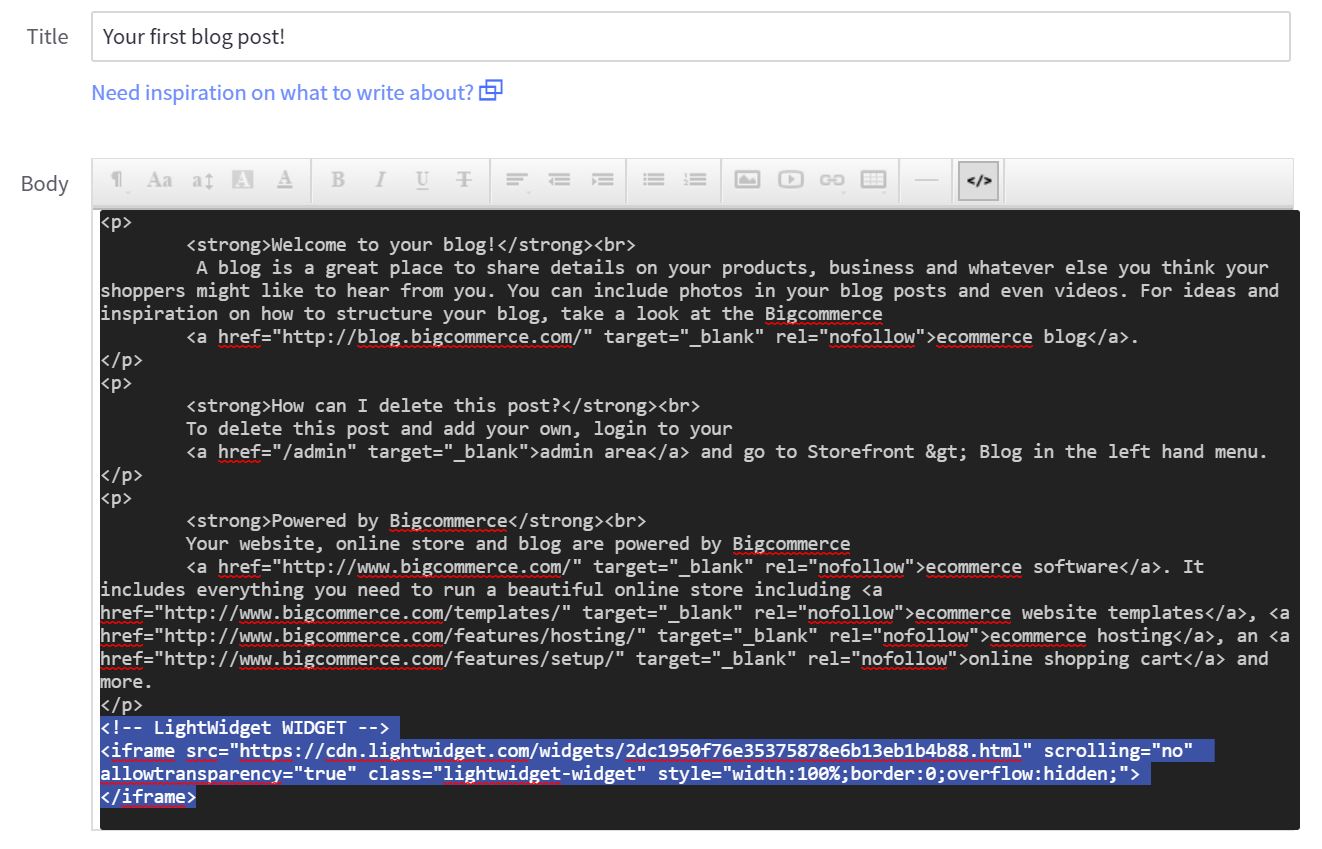
Edit the Web Page or Blog post where you want to add the Instagram plugin. Select Web Pages or Blog from the left menu and click the Page Name or Title to edit the post.
In the Body section, click the HTML button to change from visual to HTML code view. Paste your widget embed code to where you want to add our widget and click the Update button.
If you don’t know where to find your widget embed code, please read this tutorial – where can I find my widget embed code?
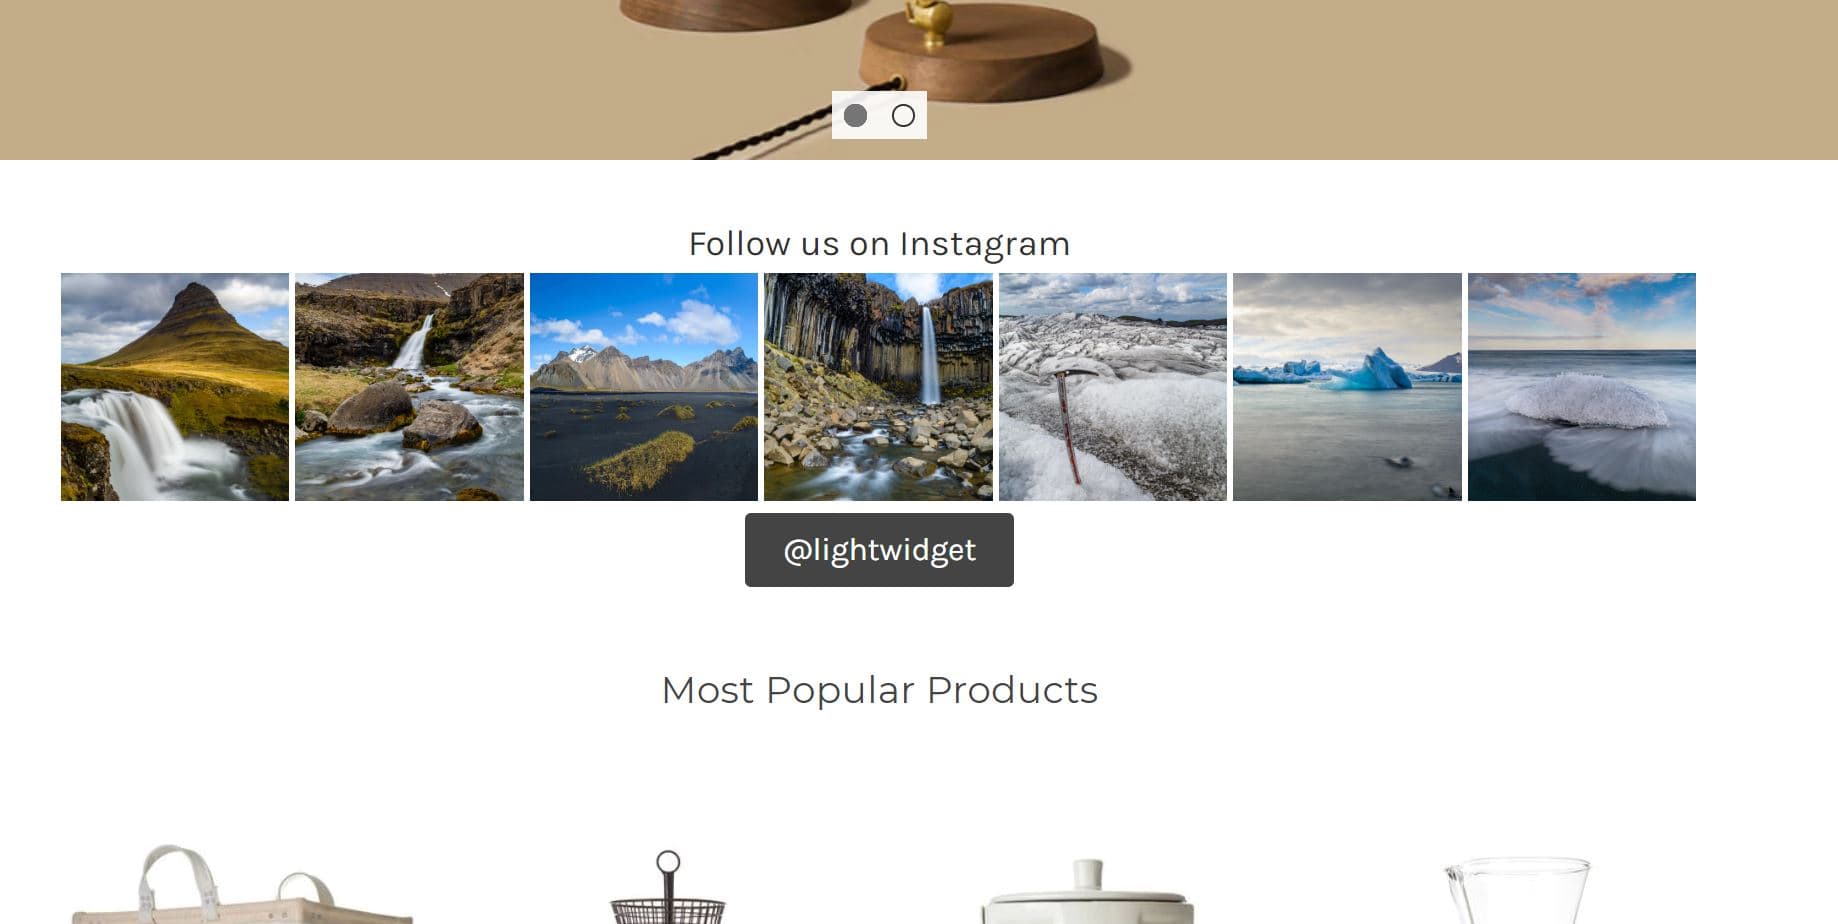
Congratulations, you just added the Instagram widget to your website:)

What is BigCommerce?
BigCommerce is a cloud-based e-commerce platform that enables businesses to build and operate online stores. It provides an all-in-one solution for businesses to create, design, and manage their online stores, with features such as customizable templates, secure payment processing, inventory management, and marketing tools.
BigCommerce allows businesses to sell their products across multiple channels, including social media platforms, marketplaces like Amazon and eBay, and brick-and-mortar stores. It also provides a range of integrations with third-party tools and services, such as shipping carriers, email marketing platforms, and accounting software, to streamline business operations.
Thousands of businesses worldwide, from small startups to large enterprises, use BigCommerce because of its user-friendly and flexible design and its various pricing plans catering to businesses of different sizes and needs.
LightWidget works flawlessly with BigCommerce websites!


Comments (0)
You must be logged in to post comments.